Then my print orders started coming in. This one in black and white in 5x7 and again in color, make it look like film, in 8x10. Spread this out across about 300 photos, the next think I knew I had about 1000 different virtual copies running about, in different crops with different processing. After that job, I decided I need to figure out how to organize a bit better.
I started playing around some, and in the process of developing my presets, I discovered the wonder of Lightroom Snapshots. Snapshots let you save a version of the file, with all processing intact to use later on. You can save multiple revisions of the same file into a handy menu located just above the History panel in the left develop pane. You can save a B&W version, color version, different crop sizes, different vignettes and keep it all contained in the original file in Lightroom. No virtual copies needed.
Now I'll walk you through the snapshot process.

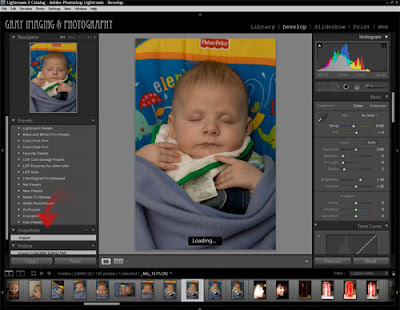
So we have the image up. Look for the arrow on the left side of the screen showing you the Snapshot pane. This is where the action goes on. Now, we will assume you have been processing you image and you have your final color version ready. So you are going to make a snapshot of the full frame image.
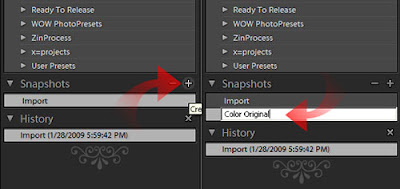
Just click on the plus icon on the Snapshot panel.

After you click on the plus icon, a white data box appears where you give the snapshot a name. The name you give is attached to the snapshot and embedded in the files entry in you LR catalog.
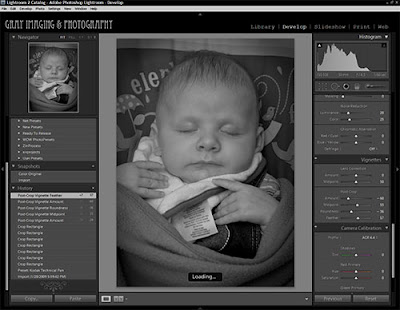
Now make another version of the same image. I am taking it B&W, cropping it to a 5x7 and adding a vignette.

With that applied, I repeat the steps to make a snapshot.

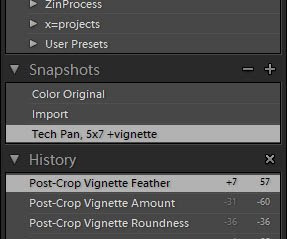
Now you can see 3 snapshots. one for the Color Original, one for import, and one for the B&W 5x7. Just by simply clicking on any of these snapshots load up all the adjustments to provide you with the image that you have saved. There is no limit I have ran into for snapshots and I often have over ten different versions of each image.
An added bonus, if you write the metadata to the RAW files from within Lightroom, all the snapshots will be saved in either the DNG or a sidecar XMP file. The snapshots are then portable and can be used in another copy of Lightroom or even Adobe Camera Raw. You will find the snapshots in the presets tab in ACR.
I know this is a rather rough run-down on the process of using snapshots, but give it a try. It is nice to have eight different revisions of an image at your fingertips without having excessive virtual copies running amok in your catalog. As I said, snapshots are Lightroom's own Version Control System.
Keep Shooting,
Michael
P.S. Cold Storage Presets Collection....you know the rest.

1 comment:
I have been saving this in my RSS reader for a nice Sunday sit down where I could enjoy it. And was I glad I did. This is a really great technique and solves an issue I had been wondering about.
Do you know if there is a shortcut which would allow us to create a snapshot via the keyboard? Can you snapshot metadata too or just the develop settings?
Thanks much.
Post a Comment