Okay, so you just downloaded some new presets, and you can’t wait to take them for a spin. First you will need to import them into your application of choice, be it Lightroom or ACR. We will walk through the process for both applications. Then I will show you how you can look inside a preset and see what it does, without even running it in your application.
So first, place your preset files (Extensions of .lrtemplate for Lightroom, .xmp for Photoshop) into a folder on your desktop. Name it whatever you want, as it is just holding the files for now. If you downloaded an archive, such as the .zip files I use here, make sure you unpack the archive before moving on.
First we will look at the method for Lightroom. Simply fire up Lightroom and get into the Develop module. Once the module loads, look to the left panel, and scroll down to the Preset tab, if you don’t already see it. Make sure to expand the tab if it has not already been opened by clicking on the small triangle on the left.
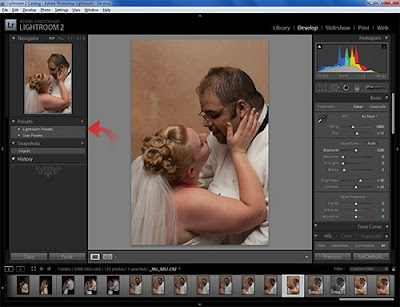
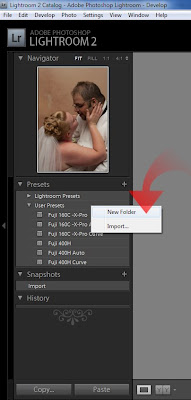
You should now see a folder entitled Lightroom Presets, which are the presets included with Lightroom itself. Beneath it is a folder entitled User Presets, bring your cursor next to it and right-click. Up pops the contextual menu with the options of “New Folder” and “Import”.
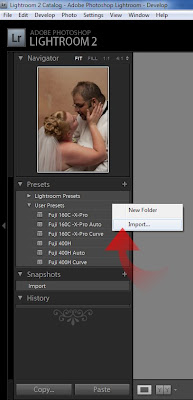
Click on “Import…” Once the dialog box opens, point the explorer to the desktop and open your folder you made earlier. Inside, highlight the .lrtemplate file you wish to import.
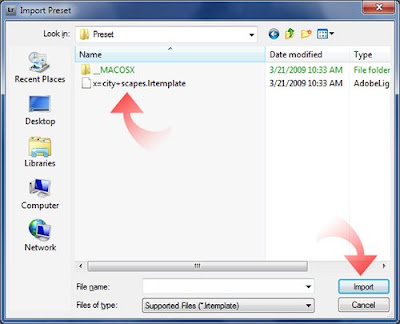
Then click “Import” and your new preset will be installed in the User Presets folder.
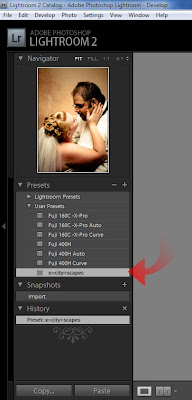
Now your preset is installed and ready for use. However you will rapidly make your User Presets folder a catastrophic mess. So you need to organize a bit. Let's go ahaead and make a new folder.
To make a new folder, right click again by the User Presets folder and choose “New Folder”.
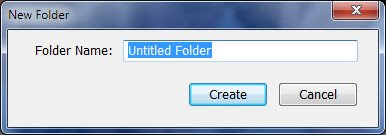
Name it whatever you choose.
This will create the new folder in the presets menu.
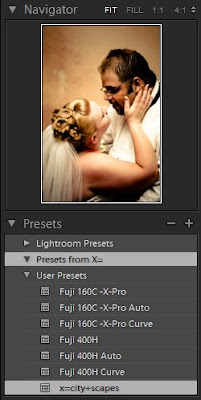
You can then drag the imported preset to the new folder or right-click next to it and import another preset into the new folder.
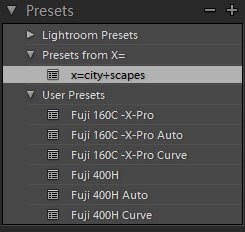 Pay attention to how you organize your presets in Lightroom, as they are a pain to sort after you have amassed a large amount. This is since Adobe only allows 1 level of folders in the presets menu. Hopefully in future releases Adobe may endow us with nested folders, and if they do it will drastically improve organization of presets.
Installing presets in Adobe Camera Raw nowhere near as elegant or user friendly, however it is quick and effective. In fact, to install the presets, you do not even have to open Photoshop, let alone ACR. To install presets into ACR, it is easiest to do it via your operating system. So open up Finder in Mac or Explorer in Windows, and point it to the following path (I believe Vista should be the same as Windows 7, but I am not sure. Vista users try it both ways):
Macintosh: /Users/UserName/Library/Application Support/Adobe/CameraRawFolder/Settings
Windows: C:\Documents and Settings\UserName\Application Data\Adobe\CameraRaw\Settings
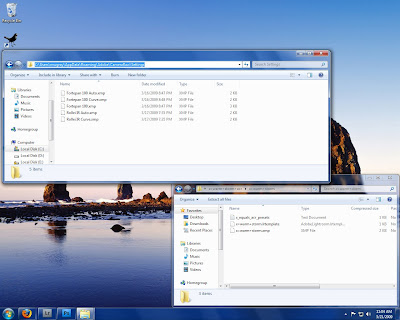
Windows 7: C:\Users\UserName\AppData\Roaming\Adobe\CameraRaw\Settings
Please insert your user name for your system into the respective path where you see UserName. If your system is installed normally, this path will place you right into ACR’s preset folder. Here is a screen from my system:
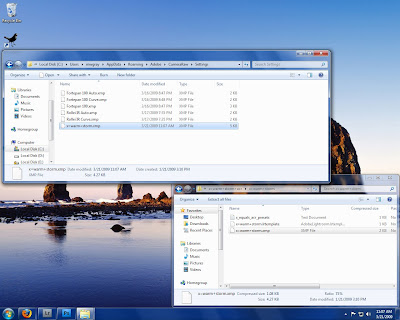
Now all you have to do is copy the .xmp presets for ACR right into this folder.
Close the folder and start Photoshop. Open a RAW file to bring up ACR.
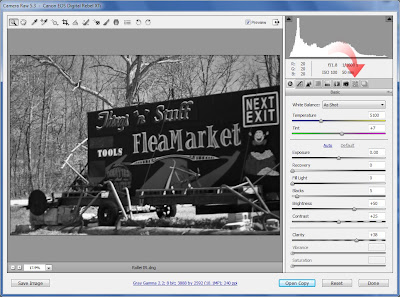
Once ACR opens, click on the presets tab.
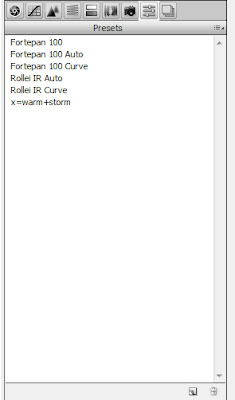
Almost magically your presets are ready to go, no other work needed. I strongly recommend only keeping presets you frequently use installed in ACR, as there is no method by which to sort them.
This is not to say that this is the only way to install presets in either program, but they are the most straight-forward in my opinion. Likely most all of you already know how to do this, but I felt that I should cover it anyways. Now onto a topic some people I know are not aware of… how to see what a preset does without loading it into Lightroom, or “Reading” a preset.
To read a preset, simply open the .lrtemplate file in any text editor. In Windows, you can just open Notepad and drag the .lrtemplate onto the empty Notepad window. This will open the preset in plain text. Although it can appear to be intimidating at first, take some time and look it over. You will start to see correlations between the text and the sliders in Lightroom. (Click the image below to view larger):
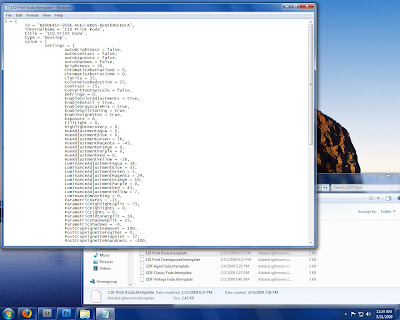
If you look at a presets text dump, I am sure you will start to see the correlations from the text file to Lightroom. A preset automatically configures your Develop Module tools for you, that is all they do. By looking at the text dump of any preset, you can see exactly what it will manipulate in Lightroom before you use it allowing you to know what to expect. It just takes a little time to get used to a tools internal name in the preset compared to the label on the slider in Lightroom. With a few reads and comparisons to the Develop Module you will get a quick understanding. You may not look at a preset’s text dump often or at all, but when you are away from your Lightroom computer, like at work, taking a peek inside a preset can tell you a lot, especially when you get familiar with Lightroom.
Also, it is possible to convert Lightroom presets to ACR. I have a tutorial up on X-Equals that explains the method to accomplishing that. Jump on over. Also, the presets I installed during this process were from Brandon's excellent collection of presets that can also be found on the X-Equals blog, click to be transported to his list of great presets. Don't forget to check out my article on sharpening in Lightroom over there too!
Hopefully this might help someone. If not, I just wasted a lot of my time writing, well not too much time. But again, I felt I needed to cover these tasks if I am to move firther into discussing presets in Lightroom and ACR.
Back again soon,
Michael


1 comment:
No wasted time writing, thank you!!
Post a Comment